Ensuring the optimal performance of your vehicle requires more than just routine maintenance. One crucial aspect of this is having a reliable method to observe the internal workings of your engine. A specific device can be a game-changer for enthusiasts and professionals alike, as it provides valuable insights into how your engine is functioning under various conditions.
Knowing the thermal dynamics within the engine can prevent potential issues and improve efficiency. By acquiring a specific monitoring device, you’ll gain the ability to continually assess performance metrics that are vital to the health and longevity of your vehicle. This article will focus on how to effectively incorporate this technology into your dashboard display.
Whether you’re a seasoned car lover or a newcomer to automotive enhancements, understanding the process of adding this monitoring tool can be immensely beneficial. With the right preparation and approach, you can enhance your vehicle’s capabilities and enjoy a smoother driving experience.
Understanding the Importance of Oil Temperature
Monitoring the heat levels of lubricants in an engine is crucial for ensuring optimal performance and longevity. By keeping a close eye on these measurements, drivers can prevent potential issues that may arise from excessive heat buildup. Understanding the dynamics involved helps maintain the vehicle’s efficiency and reliability.
Excessive heat can lead to a variety of mechanical failures, including decreased lubrication effectiveness and increased wear on moving parts. This not only affects the functionality of the engine but also impacts fuel efficiency. Thus, maintaining an appropriate range is essential for the overall health of the machinery.
Furthermore, knowing the precise readings allows for timely interventions. If the measurements indicate an anomaly, it can prompt the driver to take necessary actions, such as reducing speed or scheduling maintenance. Awareness of these conditions can save significant costs in repairs and downtime.
In conclusion, grasping the significance of these readings is vital for any vehicle owner or enthusiast. By recognizing the implications of temperature fluctuations, one can ensure smoother operation and a prolonged lifespan of the engine.
Tools Required for Installation
Before starting any project, having the correct instruments is essential for a smooth and successful process. The right tools not only facilitate efficient work but also ensure accuracy in the results. Below is a compilation of necessary items that will aid in the task at hand.
Essential Instruments
Among the fundamental devices needed, a wrench set will be crucial for accessing tight spaces and securing various components. Additionally, a drill may be required to create precise openings for mounting. A socket set is also beneficial, as it provides versatility for handling different fasteners.
Additional Supplies
In addition to the main tools, consider acquiring wire strippers for managing electrical connections, along with adhesive tape to secure wiring. A multimeter will assist in verifying electrical pathways for proper functionality. Finally, having a cleaning cloth on hand helps maintain a tidy workspace, ensuring that tools and components are kept in good condition.
Selecting the Right Gauge for Your Vehicle
Choosing the appropriate measuring device for your automobile is crucial to ensure optimal performance and maintenance. Various factors must be considered to ensure compatibility, functionality, and precise readings. This section will explore key elements to take into account when making your selection, guiding you towards an informed decision that aligns with your specific needs.
Compatibility with Your Vehicle
It’s essential to determine whether the device you are considering is suitable for your specific make and model. Vehicles can vary significantly, and using a gauge that is not compatible may result in inaccurate readings or installation challenges. Refer to your vehicle’s specifications and consult with professionals if necessary to find a product that matches your requirements.
Types of Measurements
Different measuring devices can read various parameters, impacting their effectiveness. Consider what readings are most important for your driving conditions and objectives. Some models offer additional features such as light indicators or maximum and minimum reading alarms, enhancing their utility for specific applications.
| Feature | Description |
|---|---|
| Display Type | Analog or digital formats available, each offering unique visibility and interpretability. |
| Response Time | Speed at which the device reacts to changes in conditions, vital for real-time monitoring. |
| Brand Reputation | Consider trusted brands known for quality and reliability based on user reviews and expert recommendations. |
| Price Point | Options range widely in cost, ensuring a variety of choices fitting different budgets while considering performance. |
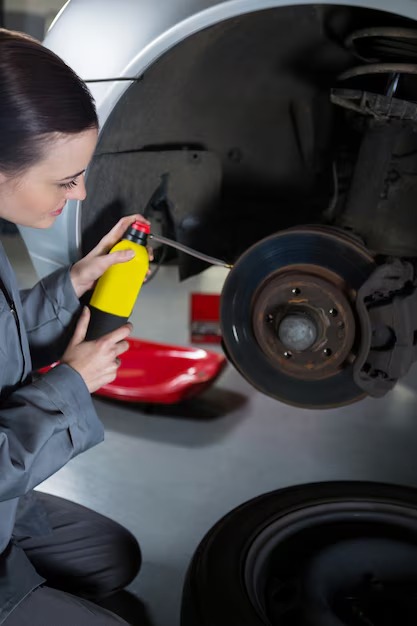
Step-by-Step Installation Process
This section will guide you through the precise procedure for incorporating a monitoring device that tracks your vehicle’s lubrication conditions. Following these outlined phases carefully ensures optimal functionality and performance of the apparatus in your engine.
Preparation
Begin by gathering all necessary tools and materials, including the monitoring unit and connectors. Ensure you have a clear workspace, and take precautions to follow safety protocols. Familiarize yourself with your vehicle’s manual to understand where to position the sensor correctly.
Connection and Calibration
Commence the setup by securing the sensor according to the specifications provided. It is crucial to establish a reliable connection with the instrument on your dashboard. Once everything is connected, turn on the ignition to test functionality. If needed, make adjustments to calibrate the readings accurately. Always double-check connections to avoid inaccuracies in measuring conditions.
Remember, proper alignment and secure fittings are essential for optimal operation. Following this guide will enhance your understanding and ensure a successful integration of the monitoring device.
Calibrating Your Oil Temperature Gauge
Achieving accurate readings from your measurement system is crucial for optimal performance and reliability. Calibration ensures that the instrument reflects true conditions, allowing for informed decisions and actions based on its output. This involves aligning the device’s readings with a known standard or reference point to eliminate discrepancies.
To begin the calibration process, it’s essential to gather the necessary tools, including a reference thermometer. This instrument should be checked for accuracy beforehand, as it will serve as the basis for comparison. Locate the appropriate operating temperature range for your system, as this will guide the calibration procedure.
Once you have your reference device in place, initiate the measurement process. Monitor the readings closely, making note of any variance between the two instruments. Adjustments should be made gradually, ensuring that each modification leads to a more precise reflection of actual conditions.
After adjustments, it’s important to verify the accuracy of the modifications by retesting at multiple points within the operating range. This step helps to confirm that the corrections applied yield consistent results. Regular checks should be instituted to maintain accuracy over time, ensuring prolonged reliability and performance of your measuring device.
Troubleshooting Common Installation Issues
When undertaking the task of adding monitoring devices to your vehicle, you may encounter a variety of obstacles. Addressing these challenges efficiently is crucial for achieving accurate readings and optimal performance. Below are some common issues one might face during this process along with potential solutions.
Inconsistent Readings
- Check the connections: Ensure that all wires and terminals are securely attached. Loose connections can lead to fluctuating measurements.
- Inspect sensor placement: Verify that the sensor is positioned correctly as per the manufacturer’s instructions. An improper position can result in erroneous data.
- Examine the device itself: Test the functionality of the monitoring equipment. If faulty, consider replacing it with a new one.
Difficulty in Finding the Right Location
- Utilize manufacturer guidelines: Refer to the user manual for recommended spots for placing the sensor and display.
- Consider vehicle layout: Analyze the configuration of your vehicle to identify suitable and accessible areas for mounting.
- Consult with professionals: Seeking help from experienced individuals can provide insights on optimal positioning.
By systematically addressing these common challenges, you can enhance the performance of your monitoring setup and ensure a seamless integration into your vehicle.
Q&A: How to install an oil temperature gauge
How does an oil temp gauge help monitor engine performance?
An oil temp gauge helps monitor engine performance by displaying the temperature of the oil as it circulates through the engine. High oil temperatures can indicate excessive friction, low oil levels, or issues with the cooling system. Installing an oil temp sensor in the oil pan or using an oil sandwich plate can provide accurate temp readings. If the oil temp gauge shows consistently high temperatures, an oil cooler may be necessary to improve oil flow and prevent overheating.
What is the function of an oil pressure sensor in a vehicle?
An oil pressure sensor monitors the oil pressure within the engine and sends signals to the oil pressure gauge. If the oil pressure drops too low, it can indicate a problem with the oil pump, clogged oil filter, or low oil levels. Many aftermarket oil pressure sensors are easy to install and can be mounted near the oil filter housing or using a pressure sender adapter. A low oil pressure warning should never be ignored, as it can lead to severe engine damage.
How do you install an oil temp sender for accurate temperature readings?
To install an oil temp sender for accurate temperature readings, a common method is to use an oil pan drain plug adapter or a sandwich plate between the oil filter and housing. The oil temp sender should be positioned where it can measure the temperature of the oil flow accurately. Some installations may require a drill and tap method to create a mounting point in the oil pan. Ensuring the temp sensor is properly connected to the oil temp gauge will provide real-time readings for monitoring engine oil performance.
Why is an oil cooler important in a turbocharged engine?
An oil cooler is important in a turbocharged engine because it helps maintain stable oil temperatures by dissipating excess heat. Turbo systems generate extreme heat, which can cause the engine oil to break down if not properly cooled. Installing an oil cooler using an oil sandwich plate or a dedicated oil pressure sender adapter ensures that oil flow remains consistent. If an oil temp gauge indicates high temperatures, adding an oil cooler can prevent engine wear and improve overall performance.
How do you install an oil temperature sensor using an NPT fitting?
To install an oil temperature sensor using an NPT fitting, first, locate a suitable mounting point, such as the oil drain plug or the side of the pan. If no pre-threaded port is available, a new thread can be created using a drill and tap method. The sending unit is then threaded into the sump or an oil filter adapter to ensure accurate readings. After securing the sensor, connect it to the gauge pod and verify the temp and oil readings for accuracy.
Why is an AEM water temp gauge useful for monitoring coolant temperature?
An AEM water temp gauge is useful for monitoring coolant temperature because it provides real-time data on engine cooling performance. Installing a temperature sensor in the radiator or coolant passage allows the gauge to detect fluctuations in coolant temp. This helps prevent overheating and engine damage. Proper gauge install requires a sending unit that matches OEM or aftermarket specifications to ensure compatibility with the vehicle’s cooling system.
What is the best way to add an oil temp gauge to an OEM oil system?
To add an oil temp gauge to an OEM oil system, use a gauge pod to mount the display where it is easily visible. The oil temperature sensor can be installed using a sump plug adapter, an oil drain plug with a built-in port, or a sandwich plate between the oil filter and housing. Ensuring a secure connection between the sending unit and gauge install is critical for accurate readings. Proper installation helps track oil performance and detect overheating issues early.
Why should you install a coolant temperature sensor on the side of the pan or radiator?
Installing a coolant temperature sensor on the side of the pan or radiator helps provide more accurate water temperature readings. The sensor must be placed in direct contact with the coolant flow to measure temperature fluctuations effectively. An OEM or aftermarket sending unit can be used, depending on vehicle specifications. Ensuring the correct thread type, such as NPT, prevents leaks and ensures a secure fit. Monitoring coolant temp helps maintain engine efficiency and prevent overheating.